What Are the Options for Painting a Car
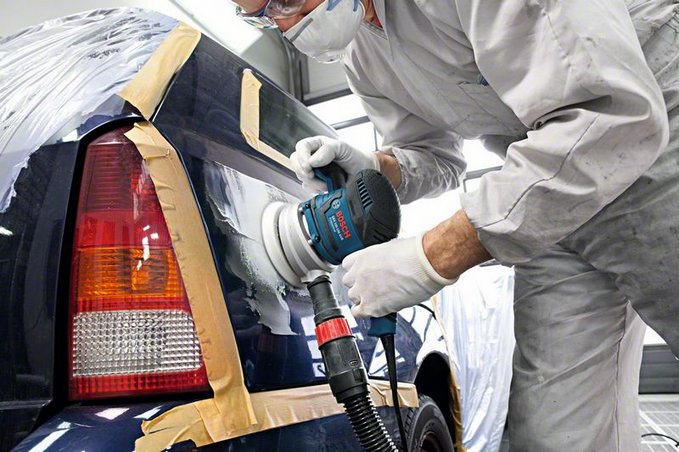
Painting a car yourself takes both free time and a significant financial investment. On top of that, the sequence of operations must be followed strictly, otherwise the final look of the restored car can be a serious disappointment.
It is best to paint a car yourself in a spacious and well-ventilated room. Keep in mind that the result depends not only on how precisely the paint is applied, but also on the quality of the preliminary surface preparation and the right choice of materials.
Tips for painting your car yourself:
If you are planning to paint your car on your own, this step-by-step guide will help you avoid mistakes and get a good result. The most important and time-consuming stage is preparation. The quality of preparation directly affects how well the paint adheres to the surface and how the painted body will look.
Preparation procedures may differ for full and partial painting, but below are universal recommendations.
Disassembly and masking:
Start by removing all detachable parts. If you plan to paint them, it is easier to do so once they are removed; if not, removing them protects them from accidental overspray.
Wash the body and the removed parts to get rid of dirt and grease or salt deposits that can reduce paint adhesion.
Cover all non-removable elements with plastic sheeting, securing the edges with masking tape.
For spot painting, also mask the surfaces around the damaged area to make the subsequent blending of colour and clear coat more precise.
At this stage, identify and fix all damage to the car, such as dents, welding, panel beating and so on.
Stripping:
Once disassembly is complete and all protective measures are in place, move on to stripping. This is the first stage of abrasive treatment, using coarse-grit sandpaper.
The main purpose of stripping is to remove the old paint layer and prepare the surface for further treatment. During stripping, chips, cracks and other defects are removed and their edges smoothed, which makes subsequent filling easier.
After stripping, the treated surfaces should be degreased.
These recommendations will help you prepare your car properly for painting yourself and achieve excellent results.
Levelling the surface with filler: In most cases, when car owners decide to paint their car themselves, it is to restore an appearance that has suffered from long use or an accident. That is why the preparation stage often involves fixing body defects with filler:
Prepare the filler compound by mixing the base with hardener according to the manufacturer’s instructions.
Using a spatula or a suitable tool, apply the filler to all problem areas, filling in scratches, dents and other defects.
When repairing large areas of damage, the filler is applied in stages, allowing each layer to dry thoroughly.
It is important that the filler sits slightly proud of the surface, since it shrinks as it dries. The excess can be removed mechanically during subsequent sanding.
Sanding: Sanding the body is practically the same as stripping, but it is carried out at later stages of preparation. The main purpose of this operation is to level the areas that have been filled and to prepare all surfaces for better adhesion of the paint materials.
Dry sanding is usually used for a filled body. If unprepared surfaces need to be treated, you can sand with water, which reduces abrasive consumption and the amount of dust.
At this stage of preparation, follow these recommendations:
Level all surfaces by removing protruding pieces of old paint and excess filler.
Sanding is done with a gradual decrease in grit size. Initial sanding is carried out with P120 abrasive, gradually moving to finer grits in the final stages (up to P500-1000).
When changing abrasive, reduce the grit size gradually, usually by no more than 100 units per step.
For mechanical treatment of large surfaces, it is advisable to use disc sanders, but watch the disc speed to avoid overheating the surface.
Since sanding produces a lot of dust, it is important to do this work in personal protective equipment such as goggles, a respirator and gloves. Using an industrial vacuum cleaner to remove the dust can make the process much easier.
Priming: The final stage of preparation for painting is applying primer. Acrylic compounds with anti-corrosion components are usually used for this. The primer may also contain pigment, which acts as the base coat of paint.
The main job of the primer is to improve the adhesion of the (pre-sanded) surface to the enamel or other paint. In addition, acrylic primer penetrates pores and scratches and fills them, giving a smoother surface and reducing paint consumption.
Primer is applied in two or three coats, with each coat allowed to dry. After it has dried completely, the surface is usually given a final sanding with fine-grit abrasive.
Once sanding is finished, it is advisable to remove the protective film and masking tape that were used to protect other surfaces from primer and the dust collected during filling, and then re-apply them. This helps prevent dried flakes of primer and filler dust from getting into the paintwork.
Now that the most difficult stage — preparation — is complete, you can begin applying the new paint coating. Various tools are used at this stage:
For spot restoration, aerosol spray cans of paint can be used.
For painting large areas or the whole car, it is best to use a spray gun with a 1.2-1.3 mm nozzle.
Before applying the new decorative coat of paint, it is recommended to degrease all surfaces again. This not only removes residual primer and dust, but also prevents paint particles from sticking to the surface.
Paint should be applied perpendicular to the surface in several coats (usually 3-4), with the coats partially overlapping each other to ensure even coverage without spatter or unpainted areas.
After the paint has been applied to the surface (especially when using metallic paint), a layer of clear coat should be applied. No degreasing is done beforehand, since some solvents can damage the paint. However, dust removal with antistatic products is a necessary procedure before clear coating.
Clear coat, like paint, is applied in several layers. In spot restoration, the clear coat is applied so that the new layer blends as seamlessly as possible with the existing clear coat at the edges of the repaired area.
Drying is an important stage after applying paint and clear coat. Drying can be divided into intermediate and final:
Intermediate drying is the waiting period between applying one coat and the next.
Final drying is the process of drying the entire body after the work is finished.
Modern automotive enamels usually need up to 24 hours to dry completely, but adding hardeners can shorten this time by 3-4 times. Using infrared drying lamps at home is not recommended, since it is difficult to ensure even heating of the paintwork from all sides.
To ensure good adhesion of paint and clear coat, it is important to avoid sudden changes in temperature and humidity during drying. It is also important to protect the surface from dust until the coating has fully dried.
Once all the stages are complete, you can move on to polishing. If defects such as orange peel, runs or uneven colour appeared during DIY painting, polishing can remove them. For this, fine-grit sandpaper (from P800 to P1500) is usually used to remove irregularities, followed by a polishing pad with a special compound to give the surface its shine.
When it comes to painting a car in Almaty, there are several key points to consider:
Choosing a workshop or service centre: Before painting your car, it is important to choose a reliable and professional place to do the work. Research the reputation and reviews of workshops and make sure they have the appropriate licence and experience in car painting.
Consultation and assessment: Before starting work, the technician should consult with you and assess the condition of your car. This will determine the need for preparatory work and the choice of paint.
Surface preparation: Before painting, the car’s surface must be thoroughly prepared. This includes sanding, filling, rust removal and other work.
Choosing the paint: Together with the technician, choose the right paint for your car, taking into account its make, model and the desired colour. Also keep in mind that the technician must be able to mix and apply the paint correctly.
The painting process: After all the preparatory steps, the car is painted. This process must be carried out with maximum care to avoid defects.
Drying and polishing: After painting, the car must be dried well and then polished to give the coating shine and smoothness.
Protection from external factors: Finally, make sure the coating is protected from aggressive external factors such as sunlight and rain. Painting a car is a complex process that requires experience and professional skills. That is why it is always better to turn to qualified technicians and service centres in Almaty to ensure a high-quality, long-lasting result