Car Painting in Almaty
Contents
Painting a car involves several stages, and following the rules and performing each step in the right order is what guarantees a high-quality result. In previous posts I have already covered the main stages and methods of preparing and painting a car. Some of that information is repeated here, but this article also touches on new aspects that have not been discussed before.
Preparation is a critically important stage, and it has a major impact on the quality of the final finish.
The room must first be cleared of dust (see the article «preparing a garage for car painting»). It is also important to clean the hose that connects the spray gun to the compressor, since dirt from it can ruin a freshly painted surface.
Before you start painting, the spray gun must be set up correctly and the paint thinned properly.
Many factors affect how paint is atomized. Even with a correctly adjusted spray gun, a certain amount of skill is needed to coat the body well. You need to know how to hold the gun, how to move it, where to aim the nozzle, and when to pull and release the trigger.
While you are learning, keeping the gun in the correct position and at the optimal distance takes conscious effort; with experience, it becomes automatic.
How to handle a spray gun
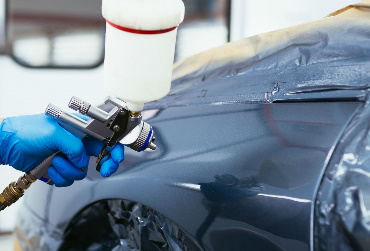
To control the spray gun correctly, keep the fan pattern vertical throughout the job. The optimal distance between the gun and the surface is 15–25 cm. A simple way to check the distance is to hold the gun about a hand’s width away (see the picture).
The gun should move freely while paint is being applied. Pull the trigger only at moments when the gun is not pointed at the surface being painted. The paint should reach the surface as an already even fan. When working on several adjacent panels, you can use the technique of releasing the trigger at the end of each pass. This technique is described in detail later in the article.
While spraying, the trigger should be fully pulled and the gun moved smoothly until it reaches the opposite edge of the body panel. Then the trigger is released, stopping the paint flow, but the gun keeps moving a short distance, about 5 cm, before reversing direction. At that point the gun is lowered slightly to overlap half of the previous stroke, and the trigger is pulled fully again.
Hold the gun at the correct angle to the surface, keep the optimal distance and maintain a constant speed. For this, the compressor must deliver a steady flow of air sufficient for even atomization. Fluctuating air pressure can cause uneven paint application, which is especially noticeable with metallic and pearl colors.
Avoid turning the gun at the end of a pass. This move is used only when moving from one area to another. Rotating the gun can cause uneven coverage.
The paint application process
Difficult areas such as corners and edges should be painted first. It is recommended to get closer (3–5 cm) for more precise coverage of these spots and to narrow the fan. When the gun is closer to the surface, move it faster to avoid uneven buildup.
When painting convex surfaces, try to keep the gun perpendicular to the surface, following every curve. This way the paint film will be even across the whole surface.
Once the edges and corners are painted, you can move on to the main surface of the body panels.
Each spray pass should overlap the previous one by 50%, which ensures even paint distribution. Avoid smaller overlaps, as they can produce visible gaps.
Let’s look at painting a vertical surface. Start at the top, aiming the center of the fan at the edge of the panel. The gun nozzle should be level with the top edge of the panel. Some of the paint will therefore land on the masking paper.
The second pass is made in the opposite direction, with the nozzle aimed at the bottom edge of the first pass. This gives a 50% overlap of the first pass and even coverage of the new area.
Keep repeating the passes, easing off the trigger at panel boundaries and lowering the gun smoothly. The last pass should be made half off the edge of the panel.
Why release the trigger at the end of each pass?
The main reason for this practice is to avoid runs at panel edges, which form when several layers of paint build up there. It means releasing the trigger before reaching the panel boundary so that paint does not land on the adjacent panel. It is important to release the trigger at the moment the gun reaches the gap between panels.
With this technique, you release the trigger at the end of each pass and pull it again when a new pass starts from the opposite edge of the panel. This method helps prevent runs at panel edges, reduces overspray and makes more economical use of materials.
It is important that the gun keeps moving before the trigger is pulled and does not stop while it is being released.
In more detail, the sequence is as follows:
Start moving off the panel and halfway along pull the trigger partway so that only air comes out.
When you reach the edge of the panel, pull the trigger fully to start spraying paint.
Release the trigger halfway to stop the paint flow when the gun reaches the opposite edge of the panel.
Keep moving another 5 cm and repeat the sequence.
A half-pulled trigger (air only) prevents the sudden burst of paint that can happen when the trigger is pulled fully.
Do not fill the spray gun cup completely with paint.
It is best not to fill the spray gun cup all the way with paint or clear coat. A full cup makes the gun heavy and less maneuverable, which can affect control and the quality of the finish. It also creates a risk of accidentally spilling paint or clear coat from the cup. Fill the cup to about half or a third of its capacity and top up the material as needed.
How many coats should be applied?
The number of coats depends on the color of the car and the type of paint used. Typically, a two-component paint applied without clear coat, or the clear coat itself, needs 2–3 coats with flash-off time between them. Some colors with low hiding power, as well as metallic paints, may require more coats.
The first coat is a tack coat, which creates a good base for the following coats and reduces the risk of runs. It is applied thin, and it is better if it stays slightly tacky. Usually 1–2 minutes of flash-off is enough. Then full wet coats of paint are applied.
Between coats you need to allow enough time for the solvent to evaporate. If this time is too short, solvent can remain trapped in the lower layers and, after the top layers dry, start working its way out, causing defects.
Paint manufacturers specify the recommended drying time at a given temperature. If the ambient temperature is lower or the room has poor air circulation, increase the time between coats to allow proper drying.
Painting sequence for a full respray
It is best to plan the sequence of the painting process in advance.
The purpose of a set sequence is to avoid flaws on the surface and to minimize unnecessary movement while painting.
As already noted, the first step is to paint all the corners and edges.
There are several sequence schemes for painting a car. In this article I will present two commonly used ones.
Large surfaces (such as the roof, hood and trunk lid) are best painted in one go, without leaving one half painted and the other for later. Otherwise, dry overspray can settle on the side that has already started drying, and the boundary between the first and second halves may become visible.
One popular option is to paint the entire top of the car first, starting with the roof and pillars, then move to the front door and work around the car (see the picture). Some painters even open the front door to finish painting by going around it. That way, dry overspray from the painted door does not land on other panels.
To make painting the roof easier, you can use a stand (such as a small bench or stool).
Sometimes the entire side of the car is painted by walking along the whole body and making long passes with the gun. In other words, the whole side is painted as one panel. In this case there is no need to constantly pull and release the trigger when moving from one panel to the next, and the paint film thickness stays the same on all panels. This method is fast and efficient. For this kind of painting the gun is set to maximum fluid delivery. The room must be large enough to walk freely along the car without obstacles, since the gun speed has to stay constant. It also takes experience to paint evenly while overlapping half of the previous pass. This method is not for everyone, and it is presented more for information than as an instruction.
Spraying mistakes
A fan pattern that is too narrow can cause striping when using metallic paint.
The same problem can be caused by holding the gun at the wrong angle to the surface.
Incorrect overlap between passes leads to uneven film thickness, visible stripes and runs.
If the distance between the gun and the surface is too small, the velocity of the air can disturb the freshly applied paint. Getting too close can cause a coarse texture («orange peel»), runs and stripes with metallic paint.
Too great a distance causes the paint to arrive at the surface already dry, which can even affect the color. A large distance also wastes paint material through excessive overspray.
A slow thinner allows some variation in the distance between the gun and the surface, but spraying too close can cause runs.
Turning the gun at the end of a pass causes uneven film thickness and excess overspray at the edges of the painted area. It also wastes 65% of the paint material.
Car painting in Almaty, body repair in Almaty